Practice setup — practice & people
Set up the organization and the people in it: practice info, physicians, staff and assistants, patient registration, and patient-portal branding.
Practice setup — practice & people
Set up the organization and the people in it: practice info, physicians, staff and assistants, patient registration, and patient-portal branding.
Set the practice record, locations, and accepted insurance
Practice Info is the organization's identity card. Org admins fill it in once; every downstream feature — claim submission, fax cover sheets, patient portal headers, online-booking landing pages — reads from this record. There is no per-physician override here; everything is at the organization level.
- Open
Admin > Practice Info. The modal opens to the Overview tab under the Practice section. - Check and correct the Organization Details. Click the pencil on the Organization Details card to edit the record in place: name, type (Hospital, Group practice, Solo practice, Clinic, Laboratory), street address, city, state, ZIP, phone, fax, and email. Click Save Organization when you're done, or Cancel to discard. These values flow into claims, fax cover sheets, and portal headers, so re-check them after a move or a rebrand. The organization timezone is shown on the same card but is deliberately not editable here — change it from Scheduling settings so appointment and reminder times are recalculated safely.
- Add Custom Info (optional). The Custom Info tab stores free-text fields shown to admins for reference — Inquiry Hero context, internal notes, third-party account numbers.
- Review Providers under the Records section. Lists every physician attached to the org. To add or edit them, use Physician Management — Practice Info is read-only here.
- Add practice Locations. Each physical address you see patients at. Locations also appear inside Scheduling > Locations when physicians assign themselves to a site.
- List Accepted Insurance. The plans your practice is in-network with. Used by online booking, intake, and the eligibility tools — patients see the list when picking a payer at booking.
Add physicians and keep their identifiers current
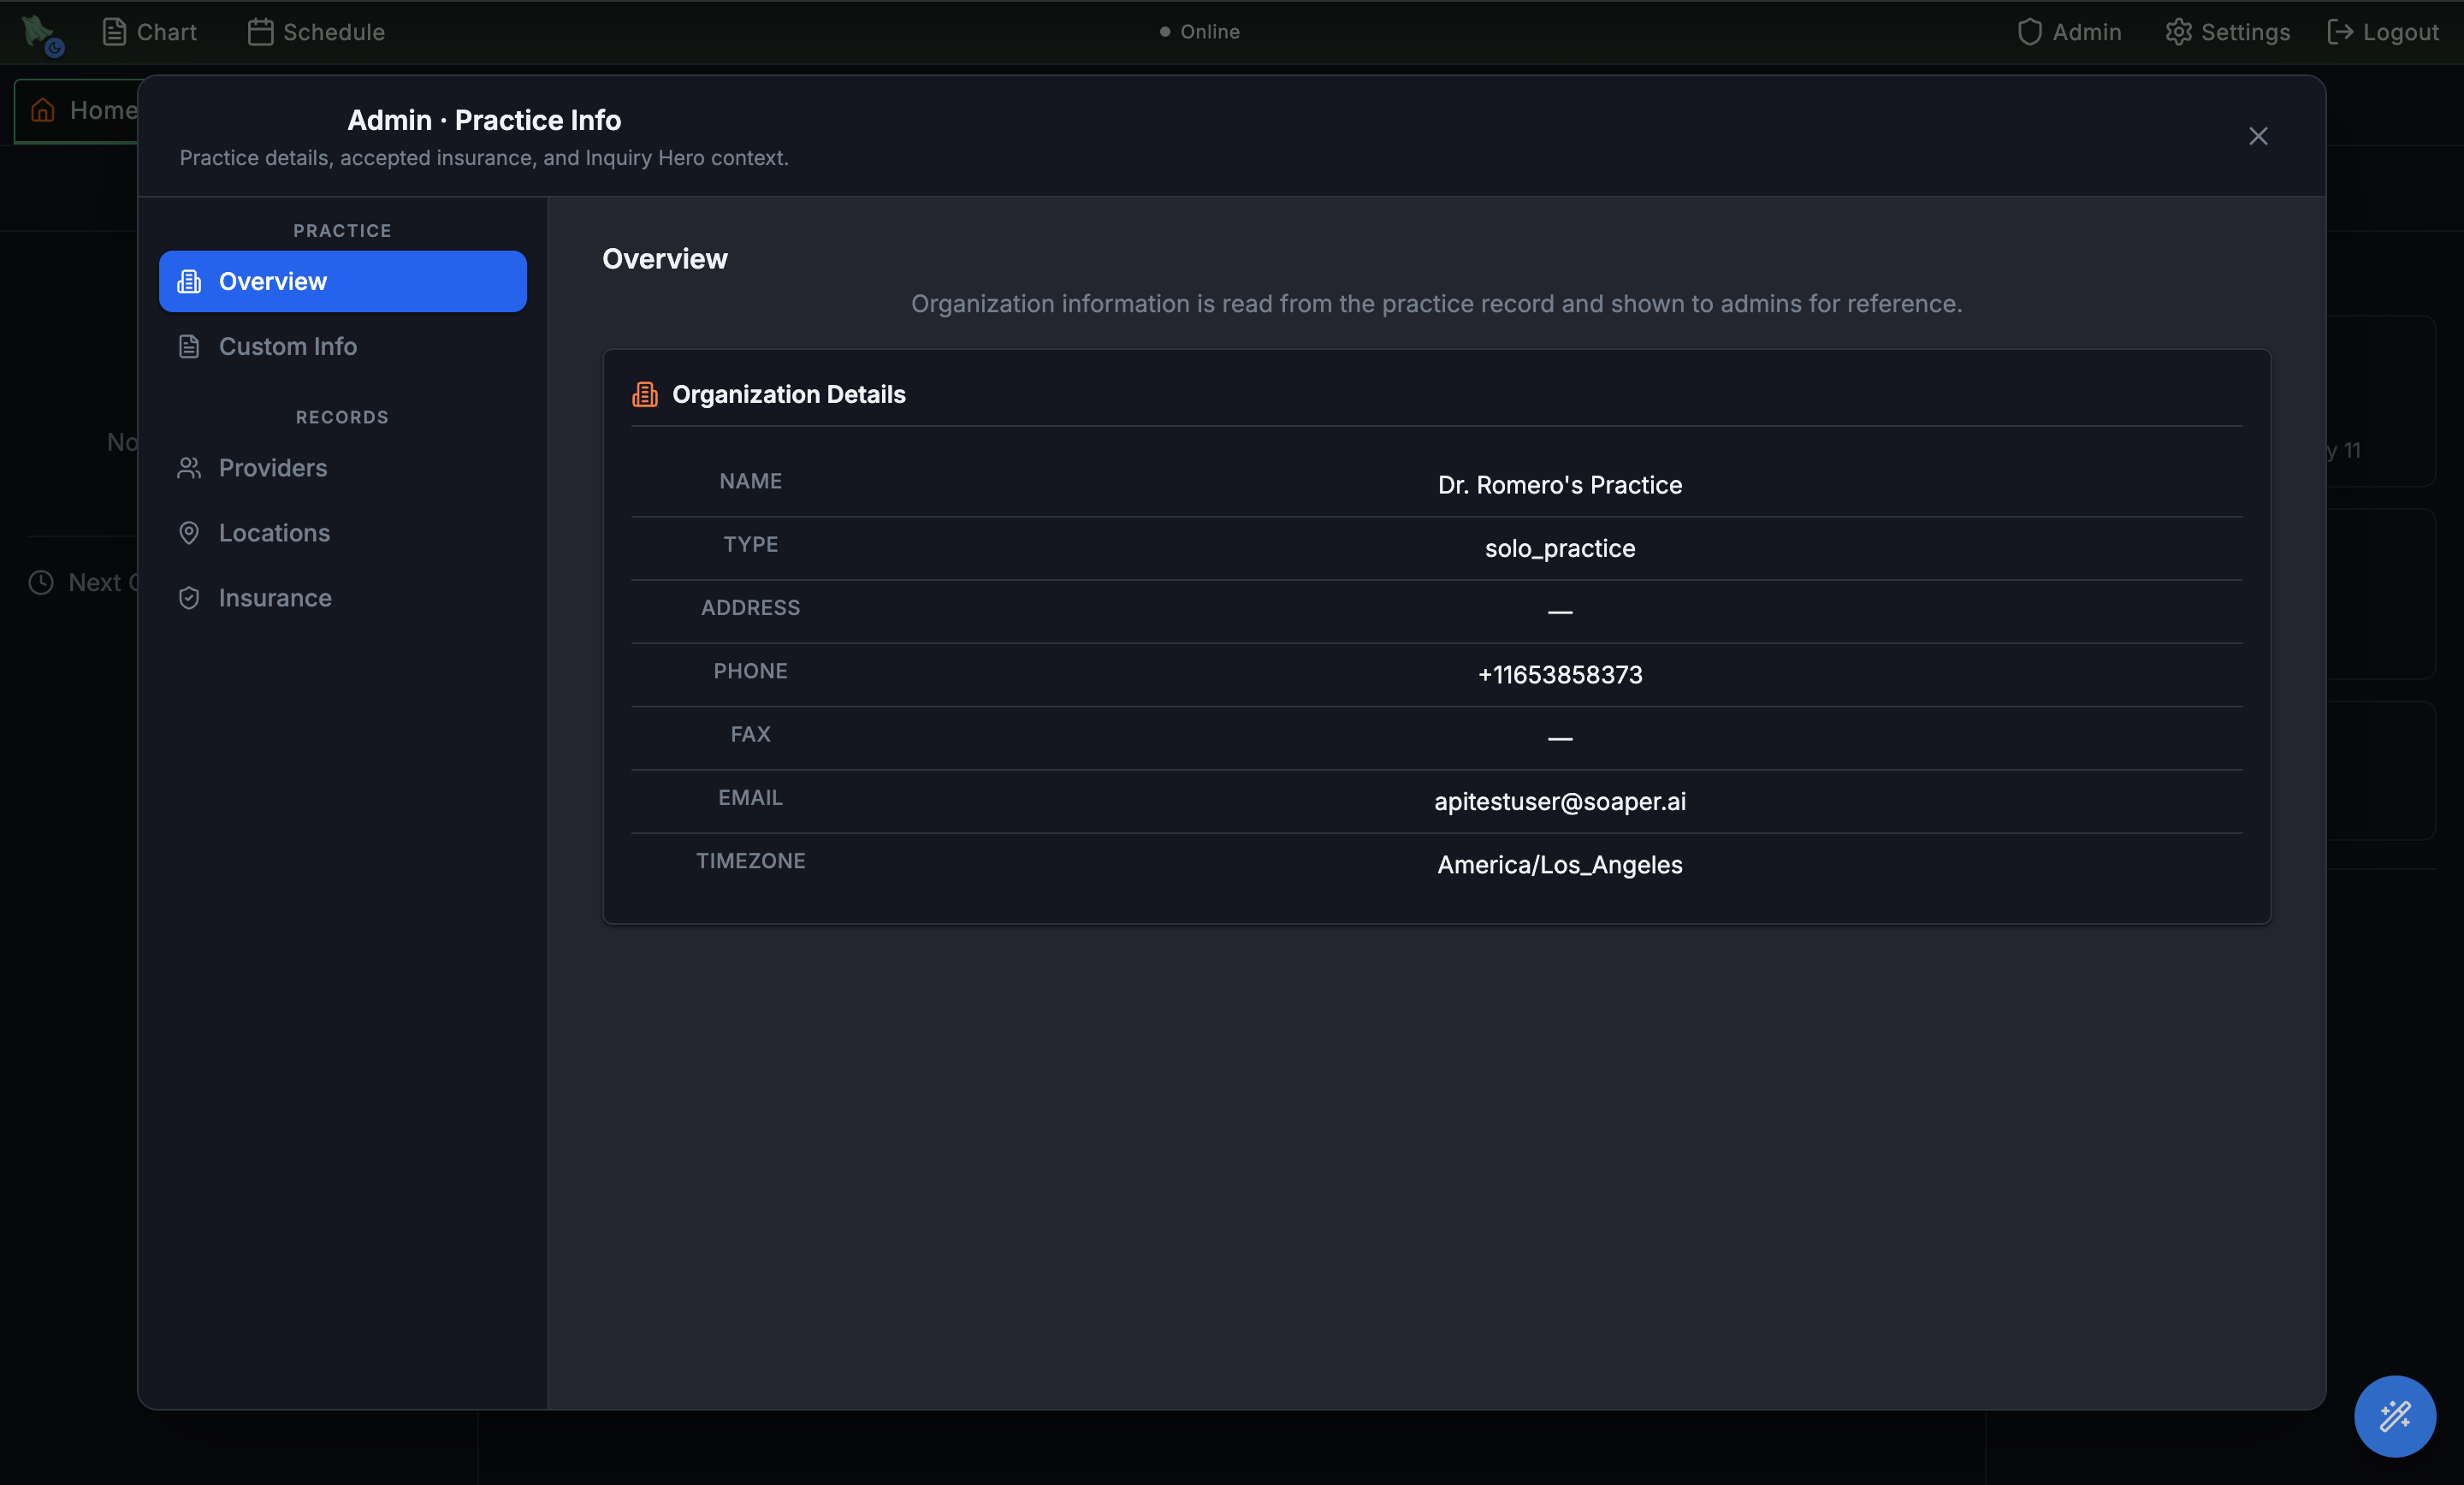
Physician Management is the source of truth for every clinician in the org. Each row carries the identifiers that downstream systems require: NPI for claims and SureScripts, specialty for online booking filters, and email for login. Each physician maintains their state-specific DEA registrations and prescribing addresses in Physician Settings. Deactivating a row hides the physician from scheduling and routing without deleting their history.
- Open
Admin > Physician Management. A table opens with every physician in the org. Search by name, email, NPI, or specialty, and narrow the list with the status pills — All, Active, Inactive, On leave — each of which carries a live count. - Use the Clinical visibility row for the second filter. Below the search bar, All / Visible / Hidden splits the roster by whether a physician is hidden from clinical contexts. Hidden rows also carry a Hidden badge.
- Click Add physician. Enter Name, Email (used for login), NPI, Specialty, and state-license information. The Email becomes their sign-in identifier, so use the address you want associated with their EMR account.
- Use Edit to update credentials. Keep NPI, licenses, specialty, and account details current here. Edits propagate to claim submission, SureScripts, EPCS, and chart signatures.
- Use Deactivate when a physician leaves. Deactivation removes them from booking, routing, and the Schedule Manager picker, but their signed notes, prescriptions, and claims remain in the chart for audit purposes.
Enter DEA registrations and service addresses
A physician who prescribes in more than one state can save one DEA prescribing location for each state. The service or office address belongs to that DEA registration, while the physician's primary or mailing address remains separate.
- Open
Physician Settings > Addresses. Use the physician's own settings rather than the organization roster when adding prescribing locations. - Keep Primary / Mailing Address for general correspondence. This can be a home or mailing address and does not determine which address is sent with a controlled prescription.
- Under DEA prescribing locations, click Add DEA location. Enter a recognizable label such as Portland office, select the registered state, enter the DEA number, and complete that location's service address.
- Add every state where the physician prescribes. For example, save one Oregon registration with the Portland office and one Texas registration with the Austin office. Use mailing address can copy the mailing address as a starting point; edit the copied fields when the registered service location is different.
- Save settings. Hero validates duplicate states and DEA numbers and requires a complete service address for each registration.
Invite medical assistants and front-desk staff
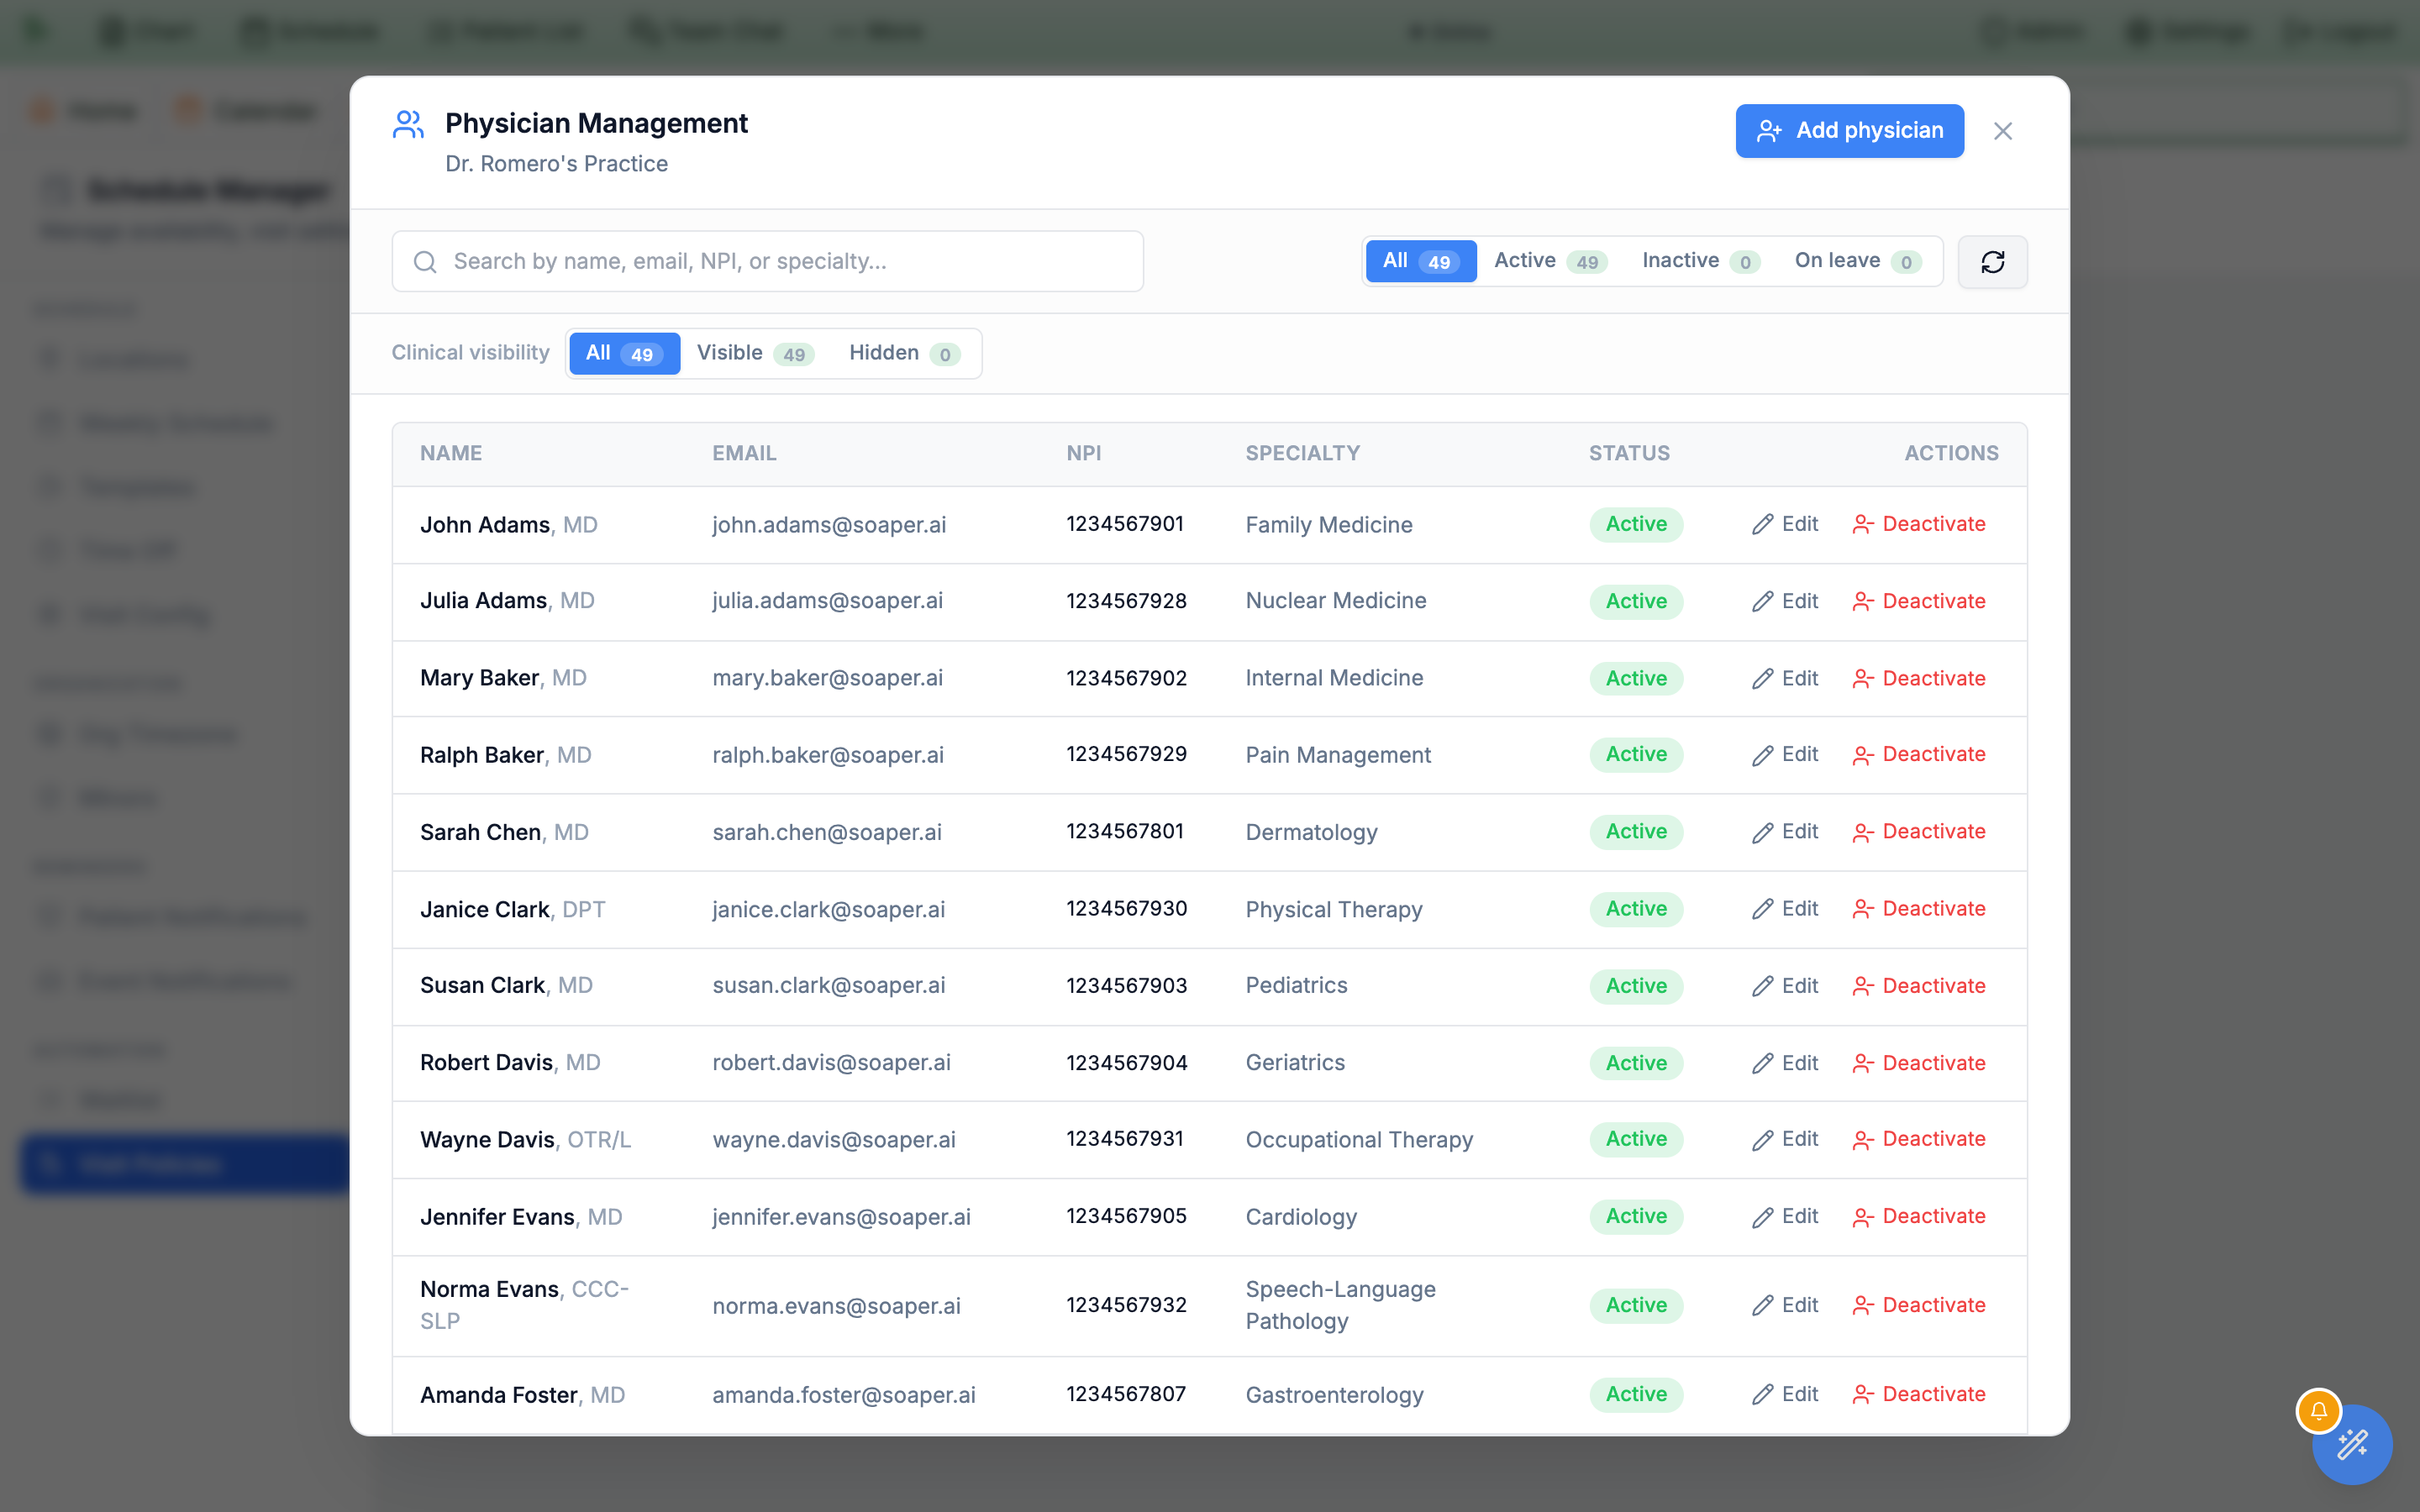
Staff & Assistants is the non-physician roster. Medical assistants, scribes, schedulers, and front-desk users live here. Each row carries credentials (MA, RN, scribe, etc.), an email for login, and a supervising physician link — assistants act on behalf of their supervisor for orders, in-basket routing, and chart access.
- Open
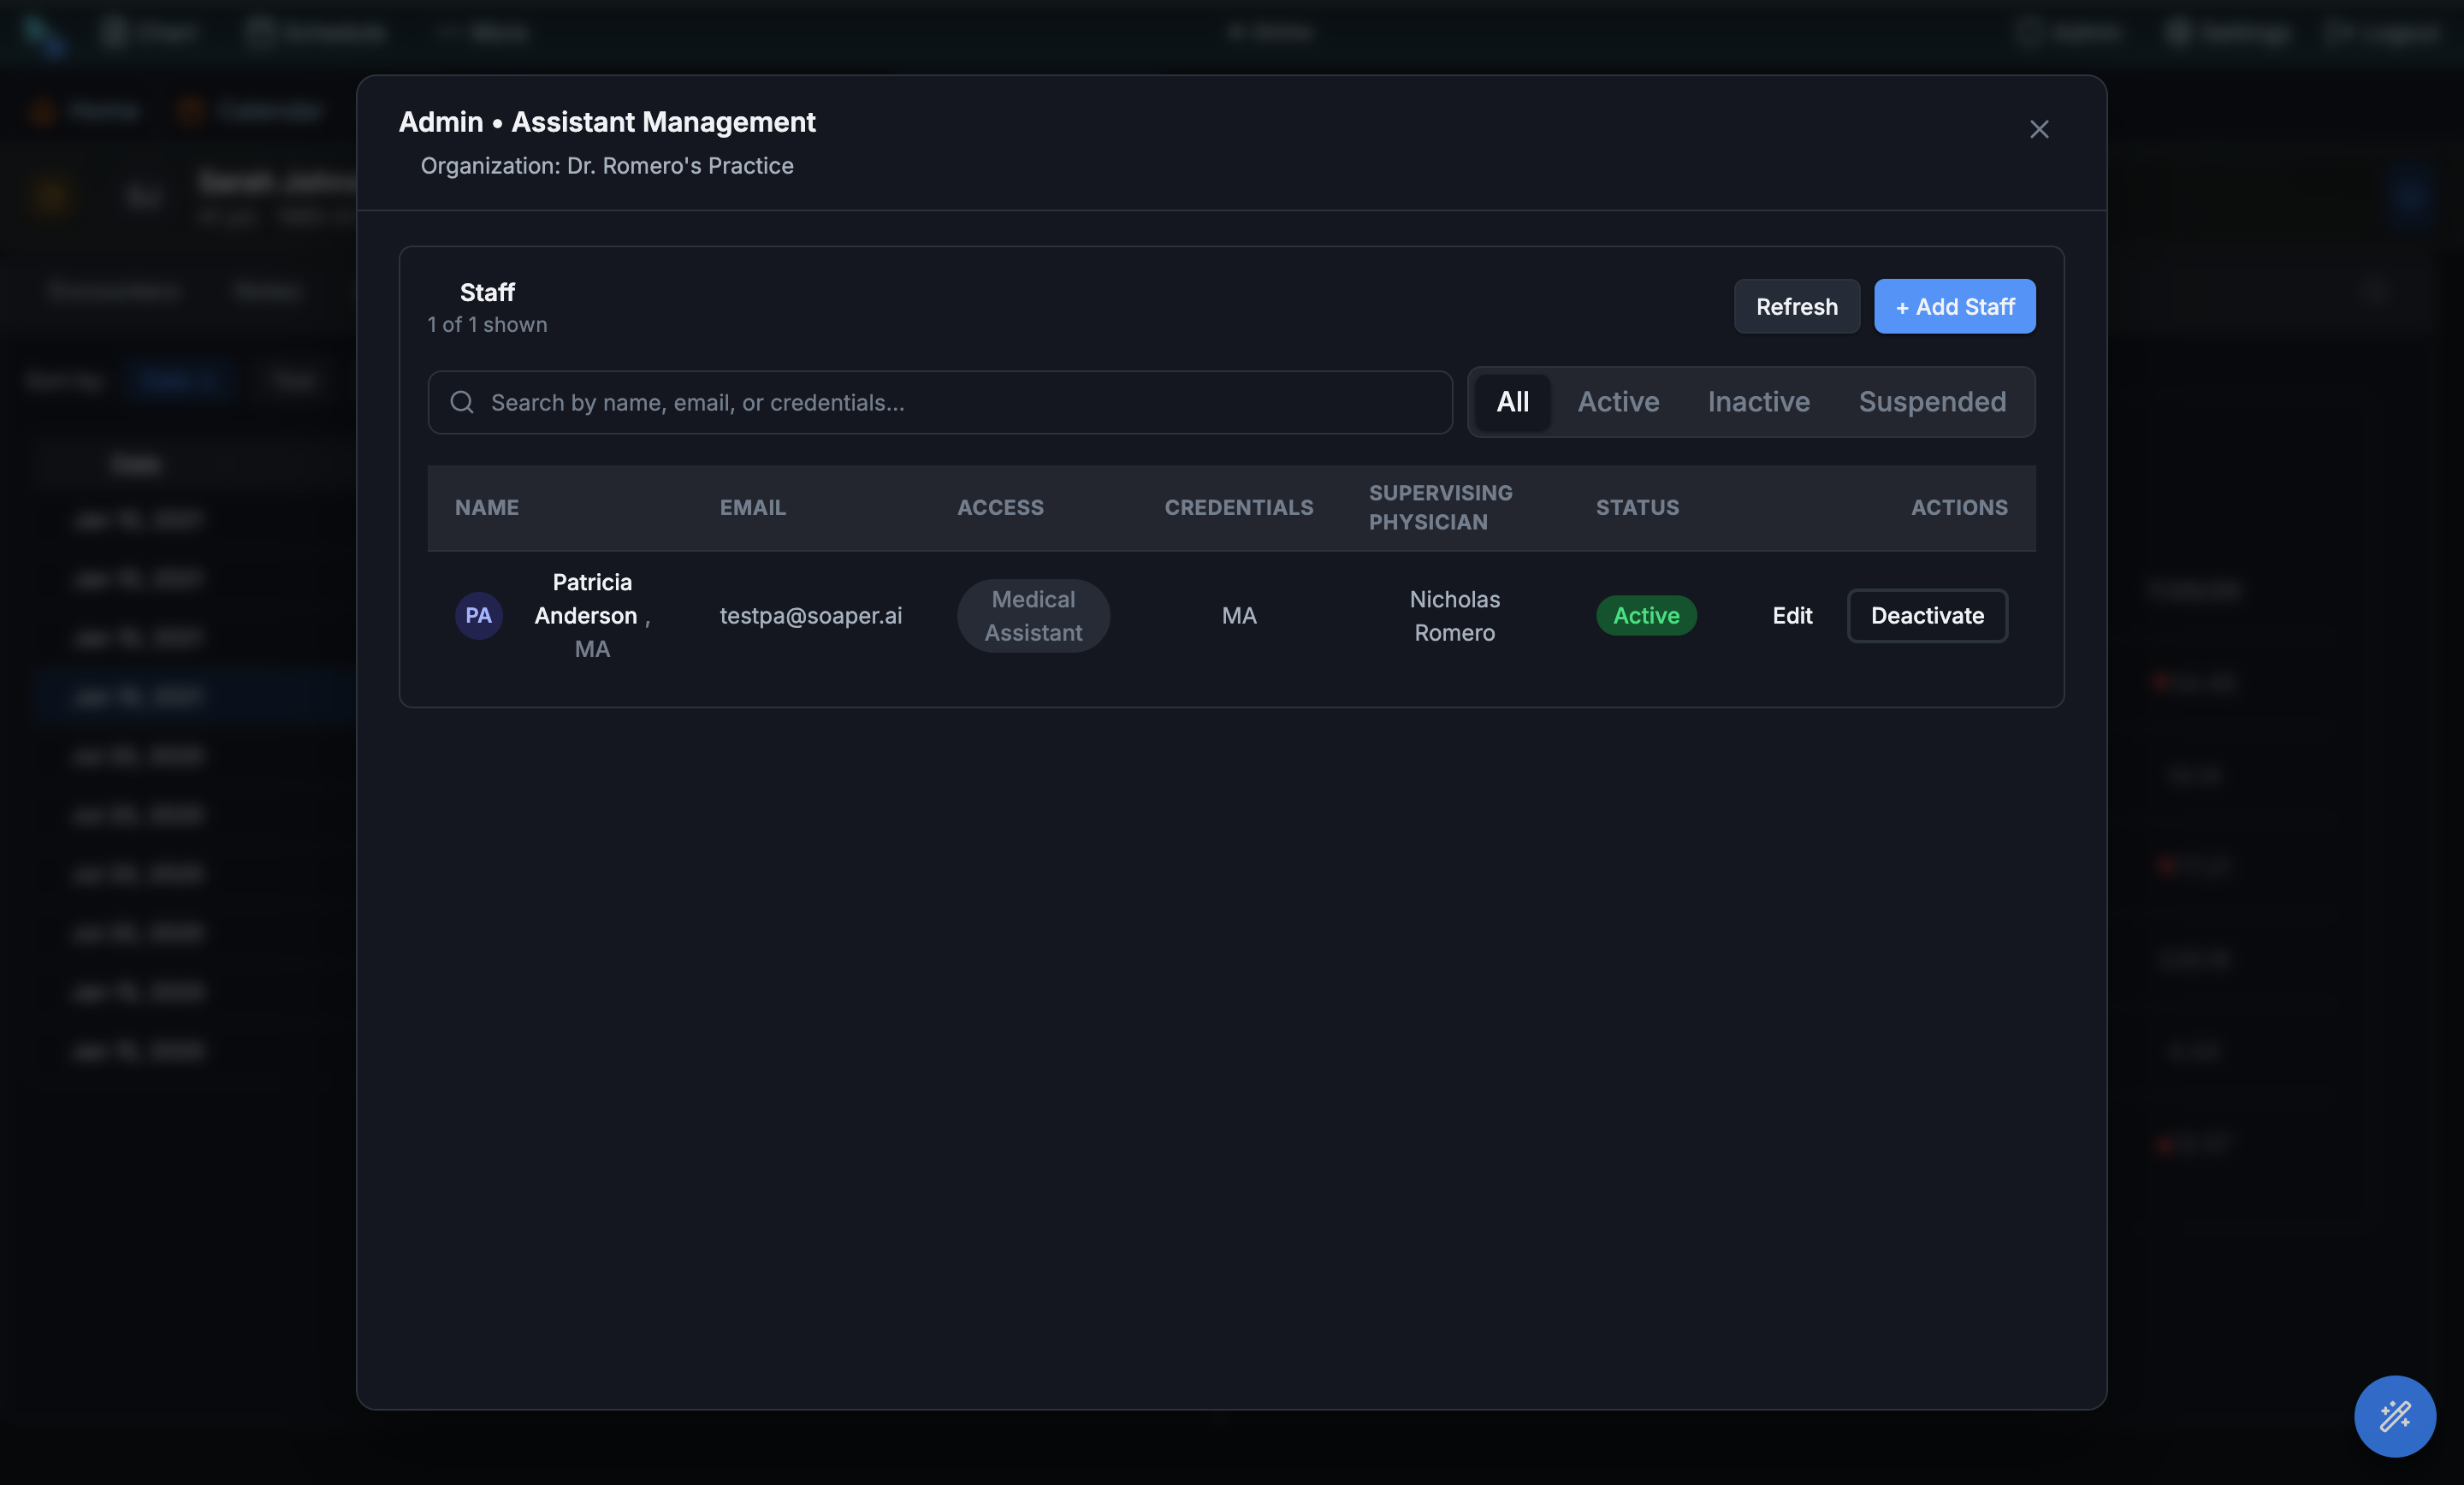
Admin > Staff / Assistants. The Assistant Management modal opens with the full staff list. Toggle between All, Active, Inactive, and Suspended tabs to filter by status. - Click + Add Staff. Walk through the staff wizard: name, email, credentials (free text — MA, RN, LPN, Scribe), and the supervising physician they're paired with on the
Profilestep, then theAccessstep — “Pick one or more role profiles, then fine-tune individual permissions if needed.” Tick Role profiles such as Front Desk, Medical Assistant, Biller, or Billing Manager, and useCustomize granular permissionsfor anything extra. - Use Edit for ongoing changes. Re-link a supervisor when an MA changes pods, update credentials when they upgrade, change email if they migrate to a work address.
- Use Deactivate when a staff member leaves. They lose login access immediately; their prior in-basket actions and chart edits remain attributed to them.
| Workflow | Role profiles that include it |
|---|---|
| Open a patient’s billing without the clinical chart, and fix the address and insurance a claim needs (Patient billing) | Biller, Billing Manager, Office Manager |
| Triage patient refill requests (Refills) | Medical Assistant, Nurse |
| Review pre-visit intake (Intake review) | Medical Assistant, Nurse, Intake Coordinator |
| Run the check-in kiosk (Kiosk) | Front Desk, Medical Assistant, Nurse, Intake Coordinator, Office Manager, Check-in Kiosk |
| Enroll and revoke walk-up tablets (Walk-up tablets) | Office Manager |
| Book and manage treatment series (Treatment series) | Front Desk, Medical Assistant, Nurse, Intake Coordinator, Office Manager |
Access step for staff who screen intake before visits; it carries no payment, billing, or chart-documentation rights. Organization owners hold every permission.
Search, add, and edit patients from the admin console
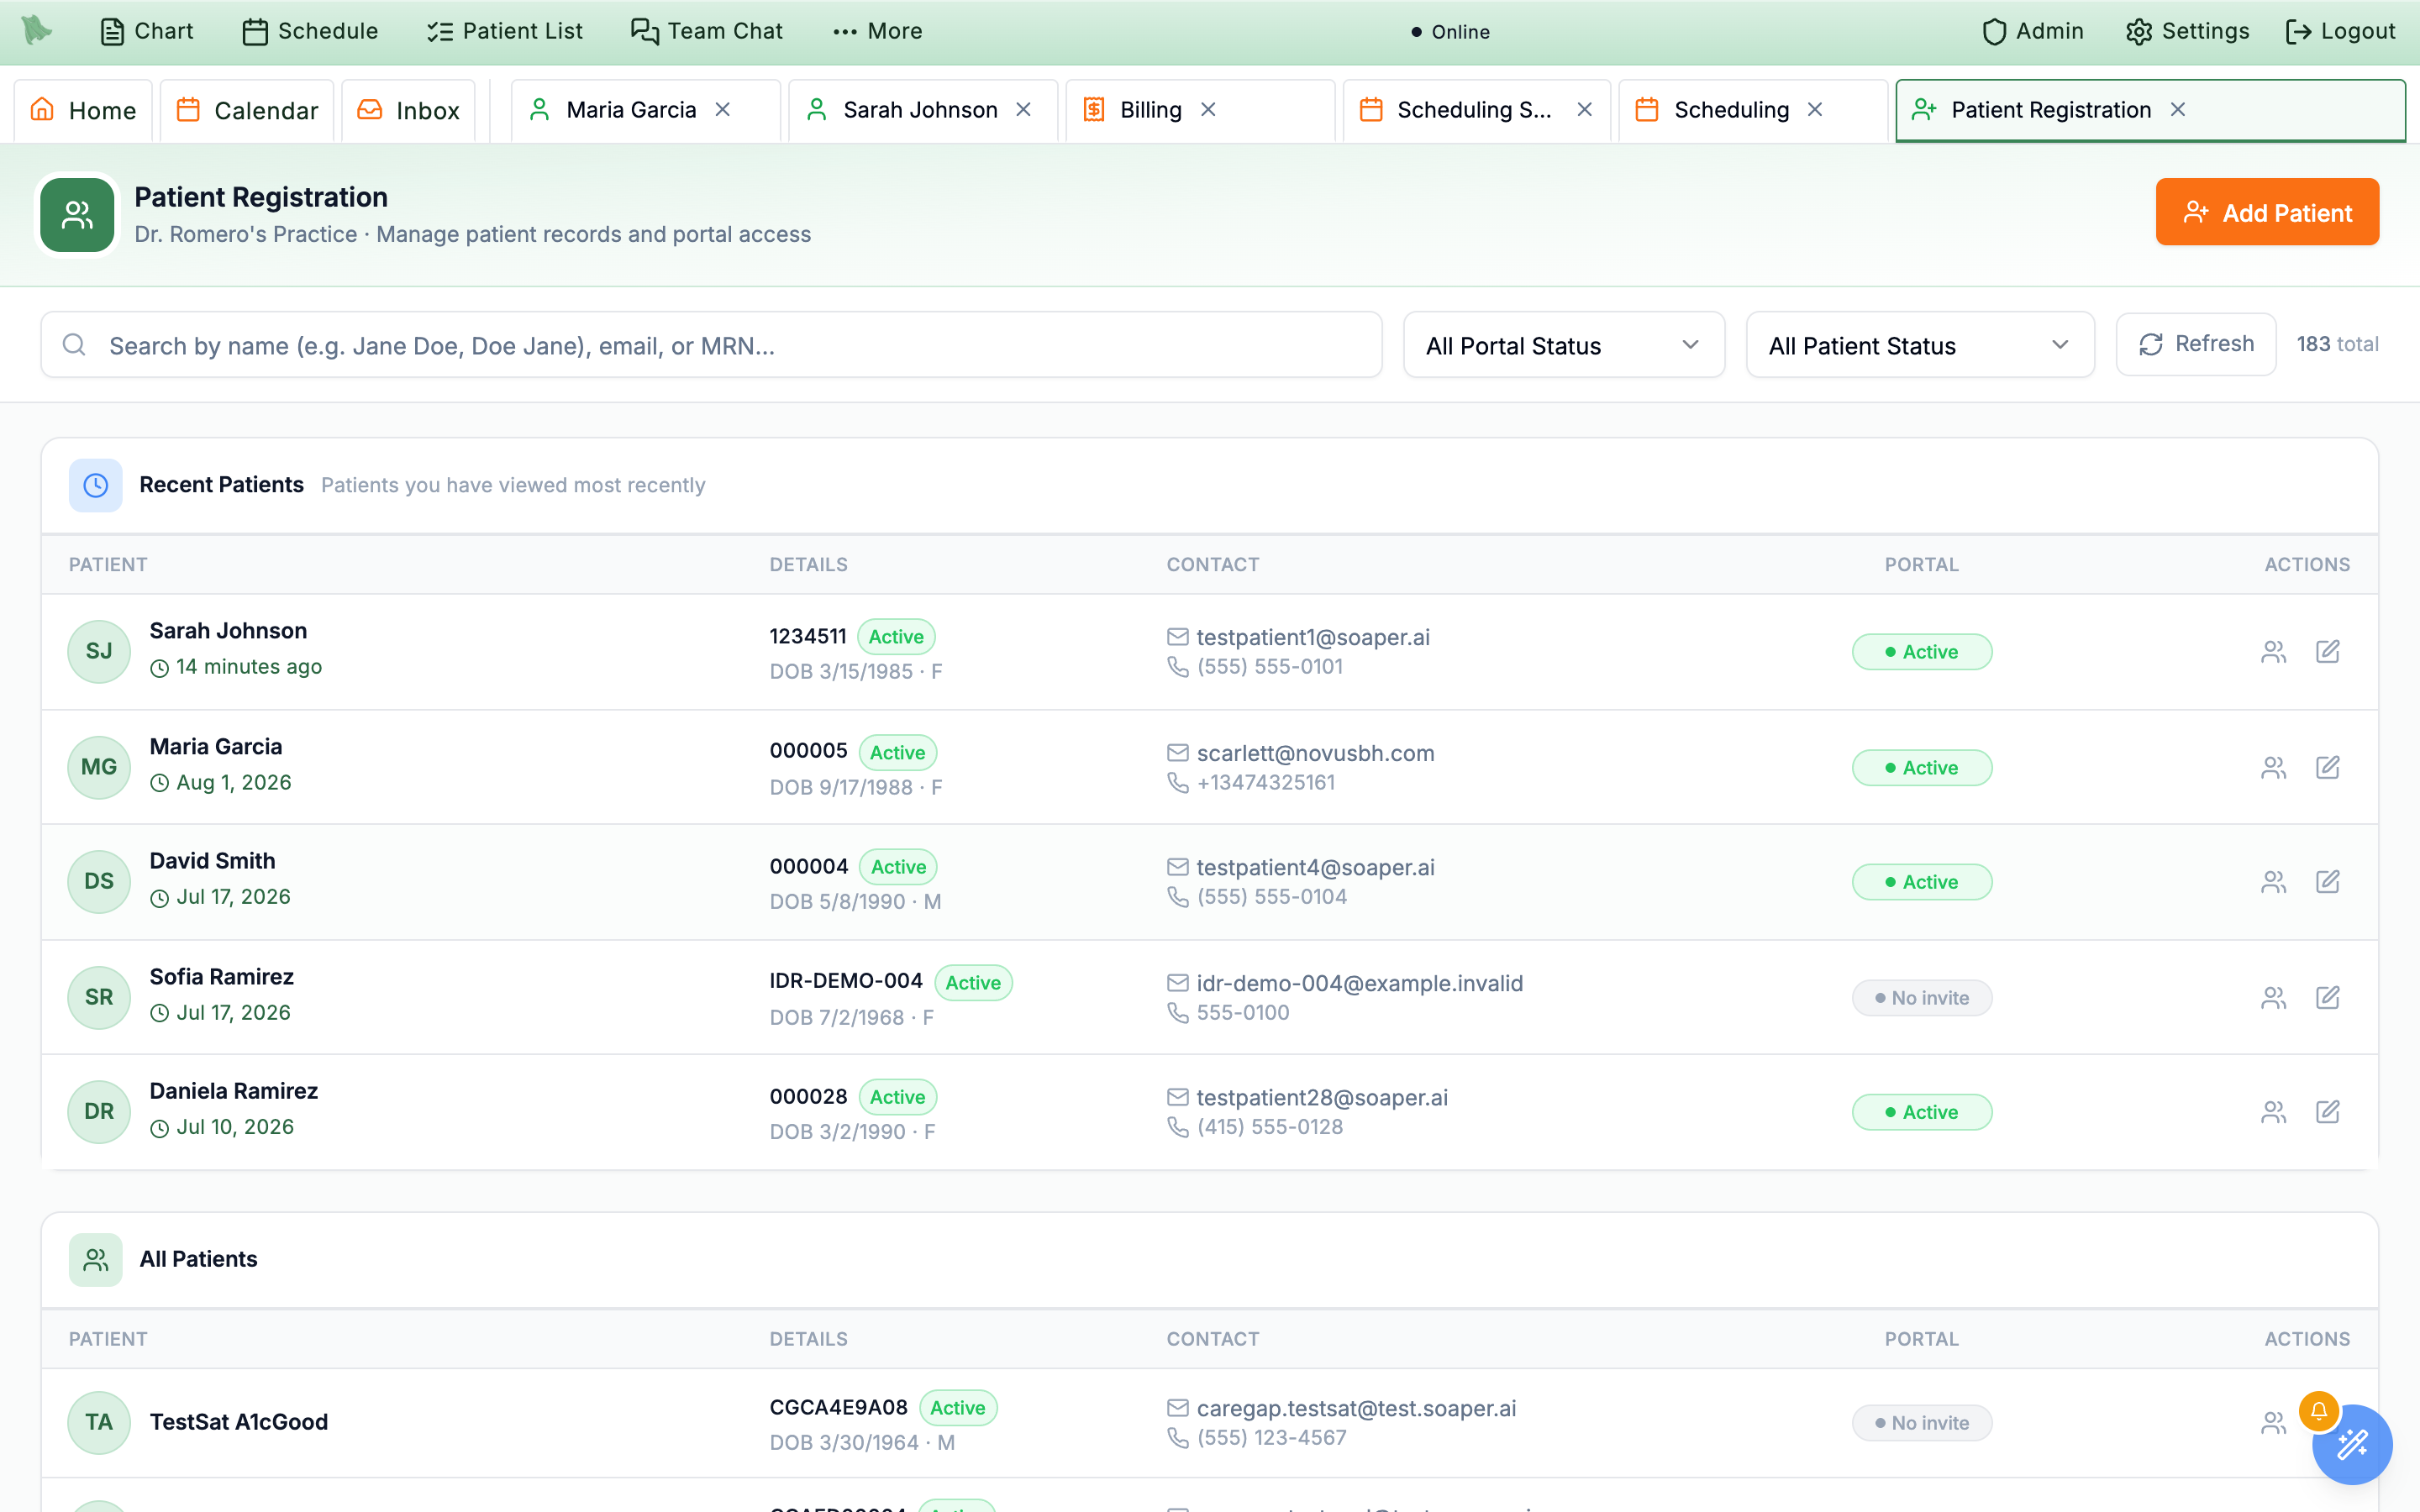
Patient Registration is the org-wide patient directory. Use it to add patients that bypass online booking (walk-ins, phone bookings, migrated charts) or to fix demographics that came in wrong from the portal. The list shows every patient in the org, regardless of which physician they see.
- Open
Admin > Patient Registration. This is not a modal — it opens as its own workspace tab titled Patient Registration (“Manage patient records and portal access”), with a searchable, paginated list of every patient. Search by name, email, or MRN. - Filter by portal status. The All Portal Status dropdown offers No Invitation, Pending (invited but not signed in), and Active. Row badges read No invite, Pending, or Active to match.
- Filter by patient status. A second dropdown, All Patient Status, filters on the clinical relationship instead: Active, Inactive, Prospective, Discharged, Transferred out, or Deceased. The two filters combine, which is how you find (say) active patients who never accepted a portal invite.
- Click Add Patient. Enter First/Last name, DOB, sex, email, phone, and address. Email and phone are required to send a portal invite — leave them blank for chart-only patients (paper charts, ghost records for migration). The address ZIP accepts only a 5-digit ZIP or a 9-digit ZIP+4 (digit-only entries are reformatted, so
410561234saves as41056-1234); it may be left empty, but insurance claims will wait on a complete address. - Send or resend a portal invite from the row. The badge in the Portal column is a button while portal access is still No invite or Pending — hovering it swaps the label to Send invite or Resend invite. Once the patient's portal access is Active the badge is plain text; there is no revoke action here.
- Edit demographics. Click Edit on any row to fix name spelling, sex, contact info, or address.
Brand the patient portal without a code deploy
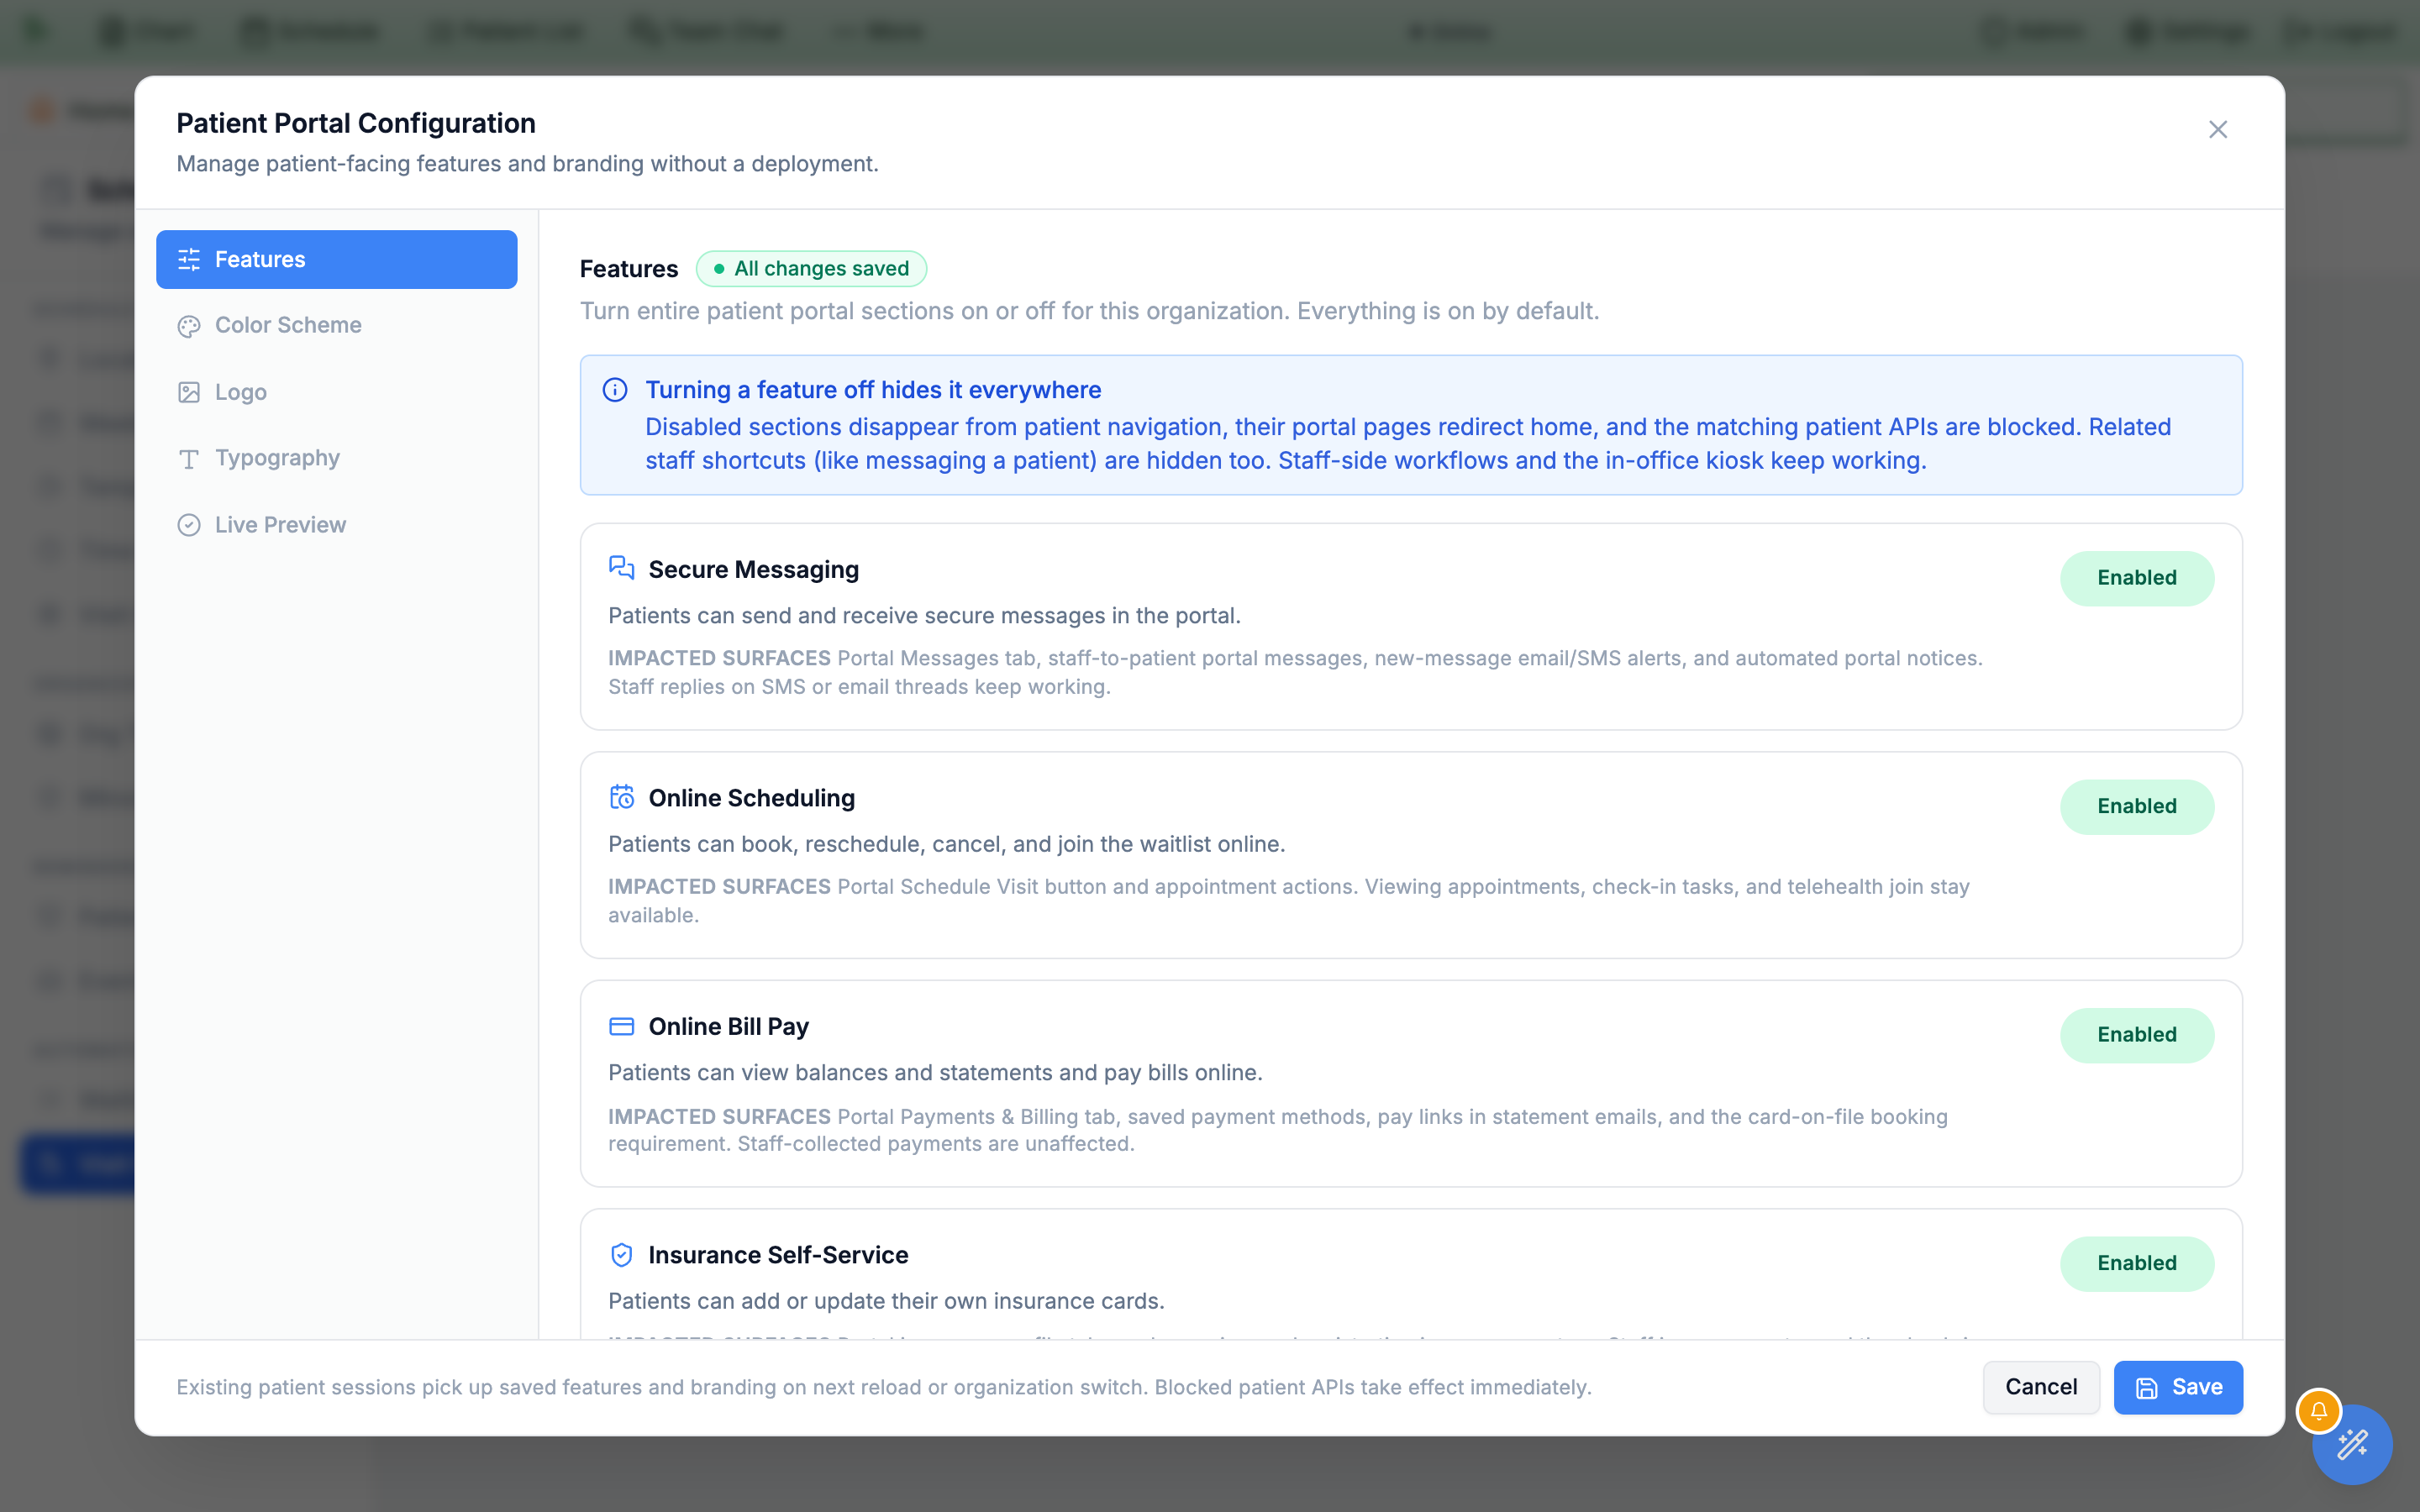
Patient Portal Configuration controls both what your patients can do in the portal and how it looks to them — feature toggles first, then color palette, logo, typography, and a live preview. The defaults work out of the box; customize when you want the portal to match your practice's identity or your landing site.
- Open
Admin > Patient Portal Configuration. The modal opens to the Features tab. Five tabs run down a left rail: Features, Color Scheme, Logo, Typography, and Live Preview. - Decide what the portal offers. The Features tab carries eight toggles, all on unless you turn them off: Secure Messaging (portal Messages tab and new-message alerts; staff replies over SMS or email keep working), Online Scheduling (book, reschedule, cancel, waitlist — viewing appointments, check-in, and telehealth join stay available), Online Bill Pay (balances, statements, saved cards, pay links; staff-collected payments are unaffected), Insurance Self-Service (patients adding their own cards; staff entry and the kiosk are unaffected), Health Records (notes, labs, imaging, shared media), Letters & Forms (patient-initiated requests; questionnaires and required paperwork are unaffected), Refill Requests (the refill button, not the medication list), and Document Uploads. Turning one off hides that surface from patients — it does not delete anything.
- Set the Orientation intake questions. Still on Features, three toggles control what new patients are asked during portal orientation: Past Surgical History, Social History (not asked on proxy accounts), and Family History. Newly created organizations start with all three on; confirm the setting before go-live rather than assuming it.
- Pick a Theme Source. On Color Scheme, three options: Current default theme (Hero defaults), Landing site theme (pulls colors already chosen for your physician landing site so portal and marketing match), or Custom colors (set each design token by hand).
- Tune the Palette. Each color chip maps to a specific portal design token: Brand button, Brand hover, Brand soft panel, On-brand text, Page background, Cards, etc. The right-hand Preview updates live.
- Watch the Accessibility card. Hero scores seven text/background pairs for WCAG contrast as you edit and prints each ratio — green when it passes, red when it doesn't. If any pair falls below AA you get “Some color pairs are below WCAG AA and cannot be saved” and the Save button stays greyed out until you fix it. A disabled Save almost always means a failing contrast pair, not a bug.
- Upload a Logo. Switch to the Logo tab, click Choose, and pick a PNG, WebP, or JPEG no larger than 2 MB — a transparent PNG or WebP looks best. SVG is not accepted and is rejected with “Unsupported logo type.” The logo appears in the portal header and on confirmation emails.
- Pick Typography. The Typography tab swaps the portal font family. Defaults match the EMR.
- Check the Live Preview. Renders an actual portal card with the active palette, so you can sanity-check the whole theme before committing.
- Click Save. Active patient sessions keep the old theme until they next reload; new sessions and emails pick up the change immediately.
Need help? Email support@heroemr.com.